Change domain name in WordPress Hostinger
Moving a WordPress site to a new domain name is possible, but it carries some risks. You can potentially lose your content, traffic, and search engine rankings if the process is done incorrectly.
When switching domain names, you can transfer to a new web host or stay with the same WordPress web hosting provider. This article will show you how to use the first method, which involves moving the entire WordPress website to a new server.
After securing a new hosting plan and a web domain, follow these nine steps to change your WordPress website’s domain without losing SEO rankings.
How to change domain name in WordPress Hostinger ?
Changing the domain name in WordPress on Hostinger involves a few steps. Here is a general guide to help you through the process:
1. Backup your website: Before making any changes, it’s crucial to create a backup of your website. You can use a plugin like UpdraftPlus or manually back up your files and database.
2. Update WordPress Address and Site Address:
- Log in to your WordPress admin dashboard.
- Go to Settings > General.
- Change both the “WordPress Address (URL)” and “Site Address (URL)” to your new domain.
- Click “Save Changes.”
3. Update the database:
- Access your hosting control panel (usually cPanel on Hostinger).
- Open the phpMyAdmin tool.
- Select your WordPress database from the left-hand sidebar.
- Locate and click on the
wp_optionstable. - Find the rows with
siteurlandhomein the “option_name” column. Update the “option_value” for both to your new domain. - Click “Go” to save changes.
4. Update URLs in content and meta:
- In phpMyAdmin, search for and run SQL queries to update URLs in your content and meta. Use queries like:
sql
UPDATE wp_posts SET post_content = REPLACE(post_content, 'old_domain', 'new_domain');

UPDATE wp_postmeta SET meta_value = REPLACE(meta_value, 'old_domain', 'new_domain');
Note: Replace ‘old_domain’ and ‘new_domain’ with your actual old and new domain names.
5. Update the .htaccess file:
- Access your WordPress installation directory using an FTP client or the file manager in cPanel.
- Locate and edit the
.htaccessfile. - Replace instances of the old domain with the new domain.
- Save the changes.
6. Update links in your theme and plugins:
- If your theme or plugins use hard-coded URLs, you may need to update them manually.
- Check your theme’s functions.php file and any custom plugins for hardcoded links.
7. Clear cache:
- Clear your browser cache and any caching plugins you may have installed on WordPress.
8. Test your site:
- Visit your new domain to ensure everything is working correctly.
Note:
- The exact steps may vary depending on your hosting provider and the specific setup of your WordPress installation.
- If you encounter issues, consider seeking help from Hostinger’s support or consulting with a developer.
How to Change Old Domain WordPress to New Domain in Hostinger ?
Today we are going to tell you the easiest way to change the domain name of any WordPress website. Please read all the steps carefully.
Step 1:- First of all make your new domain live by connecting it to a hosting.
Step 2:- Take backup of your old website in which you have to take file manager backup and SQL Database Backup, after that upload it on the new domain.
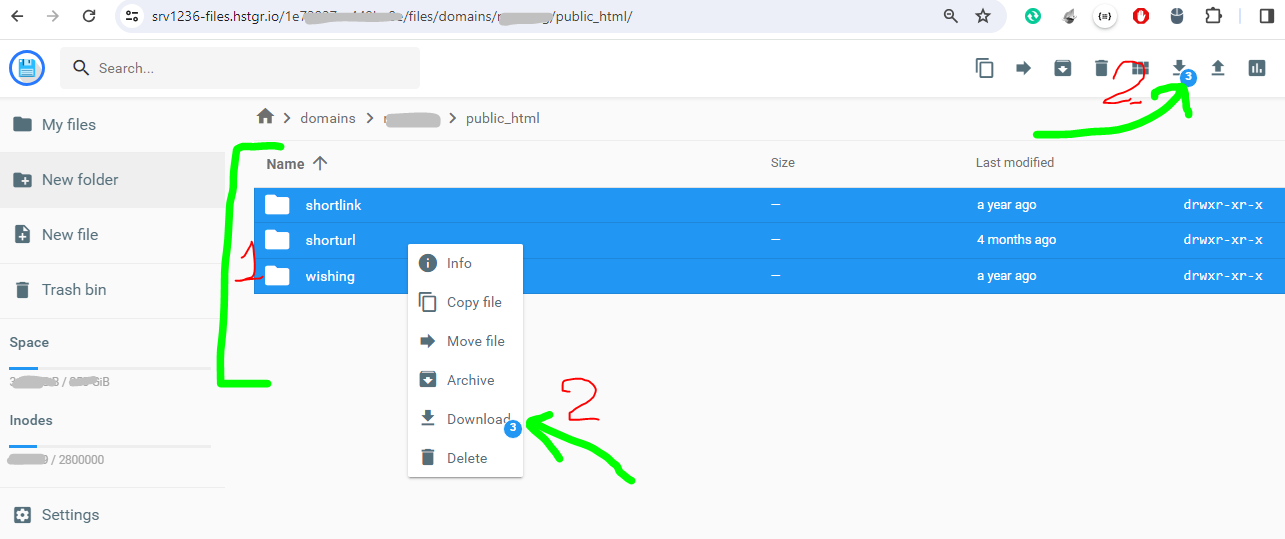
Step 3:- Go to the control panel of your hosting and click on File Manager, then click on public_html, then select the domain name, then select all the files of that old domain with Ctrl + A, then download icon and right click. You have to download it by clicking or you have to do Archive or Compression and download it by creating a ZIP file.
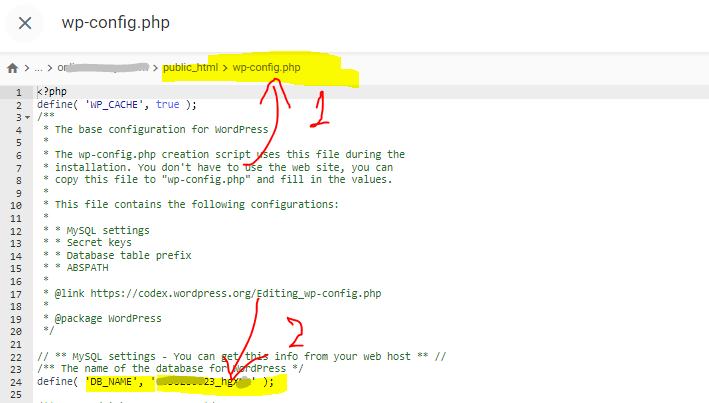
Step 4:- To take backup of the database, find out the name of the database. For this, open the wp-config.php file and check the name “DB_NAME” in it.
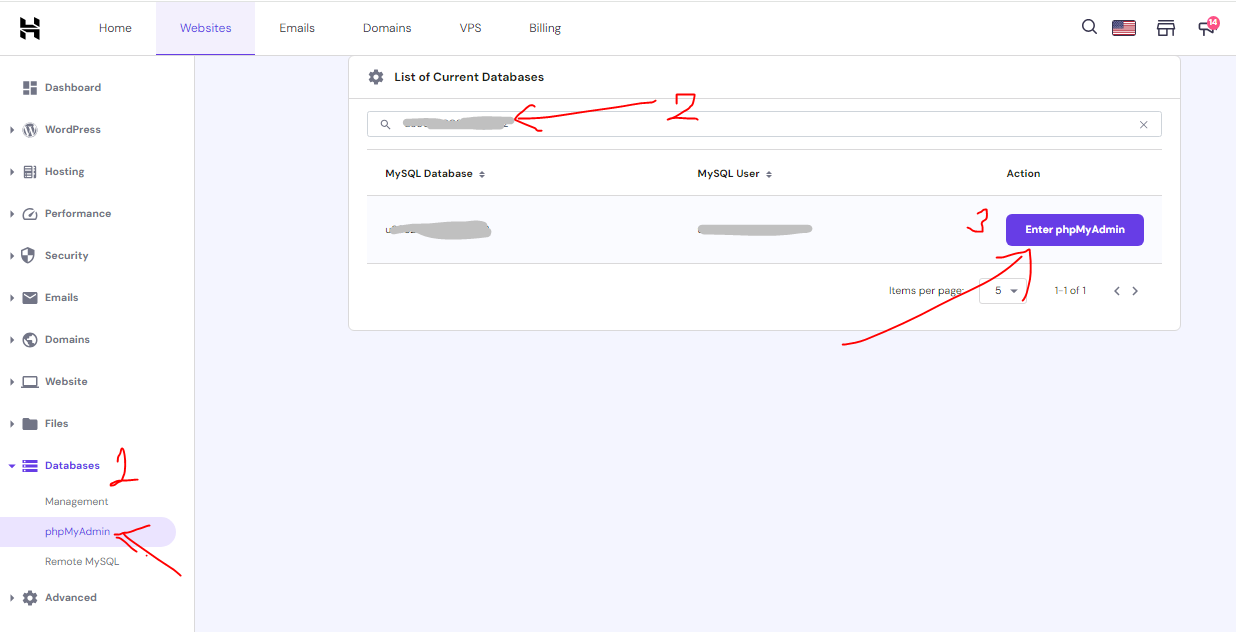
Step 5:- Select your old domain name in Hostinger panel then click on Database->phpMyAdmin option.
Step 6:- Search the name of your database. If you do not find the name, check for which domain that database was created. Revisit this option through that. Once you find the name of the database, click on Enter phpMyAdmin.
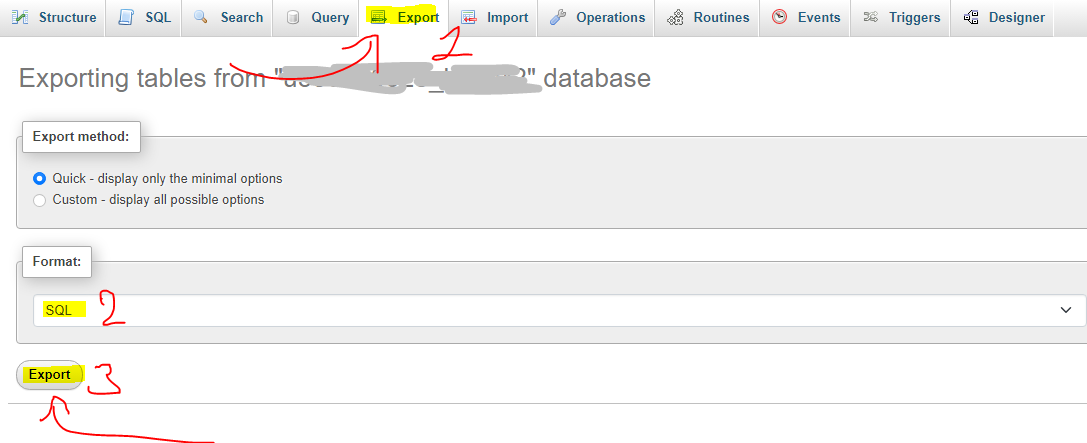
Step 7:- Then PHPMyAdmin Panel will open in front of you. Now click on the Export button. After clicking on the name of your database, if you select any table, its backup will be downloaded. After clicking on the database name, on exporting, the entire database will be exported. SQL file will be downloaded.
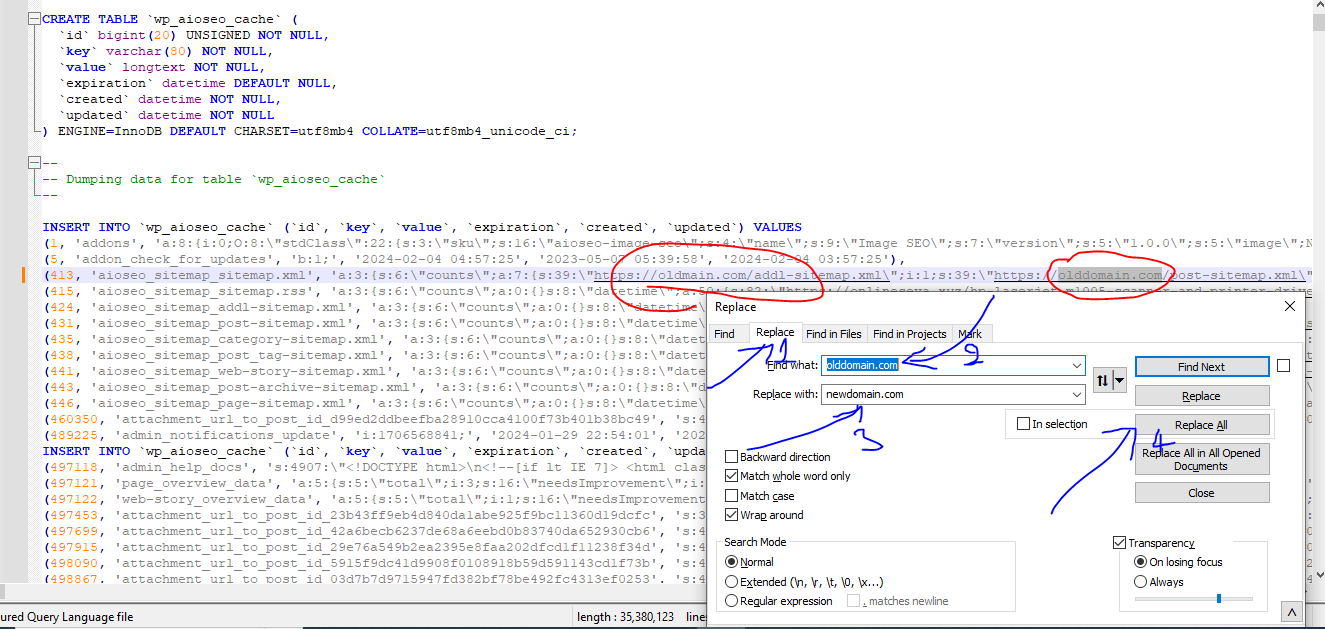
Step 8:- Open the database you have downloaded in any notepad press ctrl + f, replace your old domain with the new domain and then save the file.
Step 9:- If you are changing the domain name and want to keep only the previous database, then you have to visit the phpmyadmin panel of the same database, then select all the tables of that database, delete and drop them, and then add the new database that has been created. Import it.
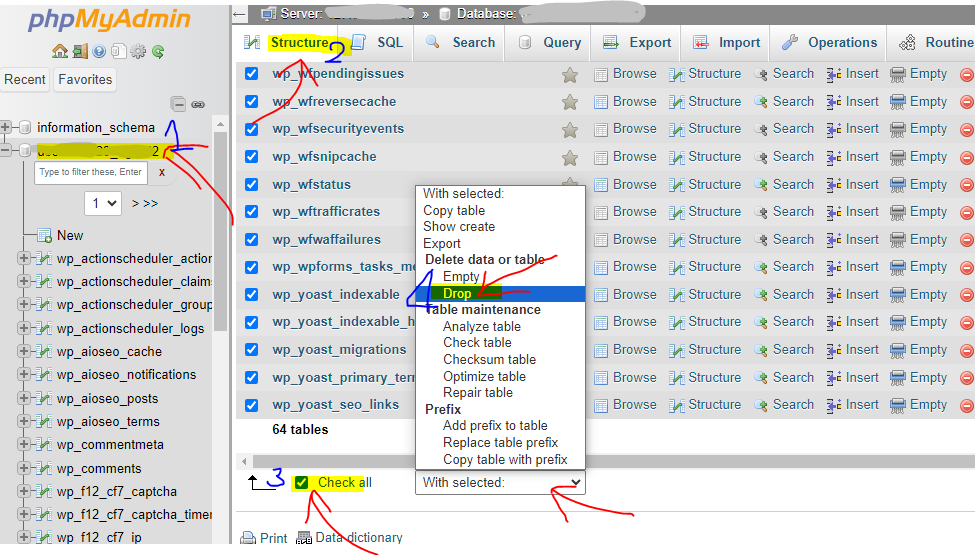

Step 10:- This has to be done when you want to keep the database old – first click on the database name, click on Structure button, then select all the tables with Check all, drop in “With selected:” and do this in that database. All tables have to be removed.
Step 11:- If you create a new database then you can follow this – After removing all the tables of the old database, click on Import button to upload the database.
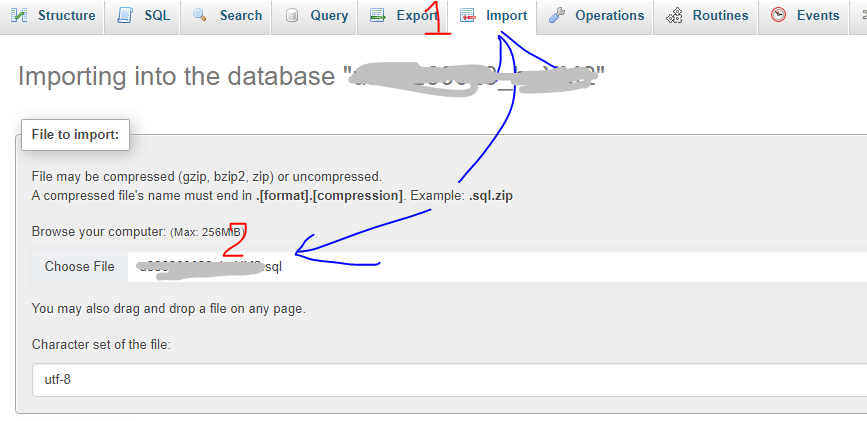
Step 12:- Click on the Import button and select the sql file of your database in Choose file.
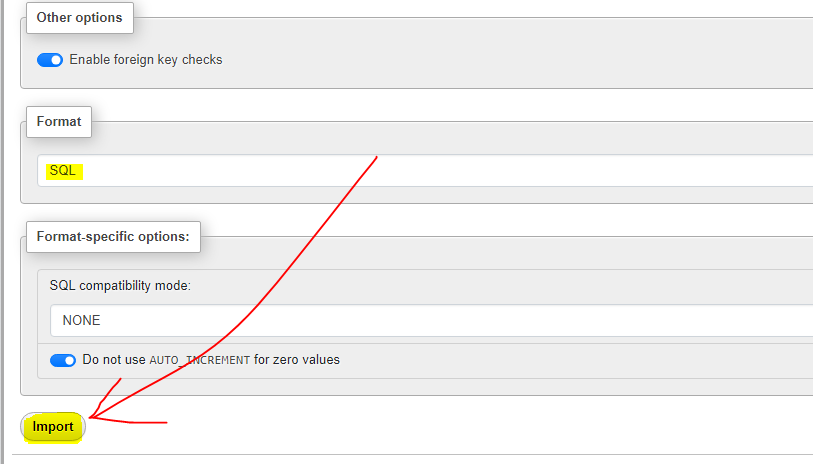
Step 13:- Click on the Import button here, after the database is uploaded, your website will be transferred from the old domain to the new domain. If the website does not open or a database error occurs, then confirm the database name and user password in wp-config.php. do it
Step 14:- When you open your website, you see that your website is not opening properly, on clicking on any post it is redirecting to the old domain, this is happening because your website is a case in your local browser. It takes time to get cleared, after waiting 24 hours, open the website again, the website will open, then open any post, replace the old domain in the URL with the new domain, then run the post in the new domain. But it will open, this problem comes due to the browser, you wait for a few hours, it will be fixed automatically.
Your Website is Live Done.