In the digital age, having a website is essential for businesses, organizations, or even personal projects. While there are numerous hosting options available, Firebase Hosting stands out for its ease of use, scalability, and affordability. What’s more, Firebase Hosting offers a generous free tier, making it an attractive option for those looking to get their website up and running without breaking the bank. In this article, we’ll walk you through the process of uploading a static website to Firebase Hosting, step by step.
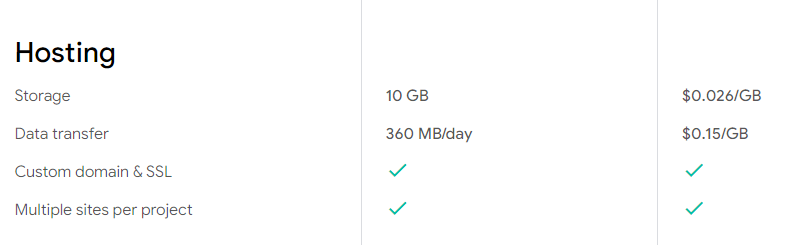

* No-cost usage on Blaze plan is calculated daily. Details differ slightly for Cloud Functions, Firebase ML, Phone Auth, and Test Lab.
For more info, see the FAQs or view our documentation on understanding billing.
How to upload a Static Website for Free to Firebase Hosting?
If you want to host your static website files in Google Firebase hosting, what do you have to do? To host a one page website in firebase follow the steps given below so that you can host a static website for free.
How to create a project in Google Firebase for website hosting
If you want to host your static website by creating your own subdomain with web.app domain then follow the steps given below so that you can host your website for free.
How to create subdomain in Web.app domain for free website hosting
You must have seen such websites which have a domain from the niche of web.app at the end. If you also want to create subdomain.web.app website for your example, how can you do it. Google Firebase provides free hosting with web.app domain, you can create a static website here, it supports only html, css, js. If you are creating a one page website for your shop, you can create it for free with web.app, from here you will not have to spend a single rupee, you get free hosting and free domain. And the server of this hosting also does not remain down.
If you want to host a one page website here, then life time will run non stop. If you want to host the website by creating a subdomain on web.app, create your project on Google Firebase and install node js and then run cmd on the computer. Open it using firebase login and upload source files to webstie and your website will go live instantly.
How to create a project in Firebase for website hosting ?
If you want to host a static website on Google Firebase hosting then follow the steps given below –
Step 1:- For Google Firebase Login visit : https://console.firebase.google.com/
Step 2:- As soon as you login by clicking on the given link, you will be registered.
Step 3:-After logging in with Gmail, create a project.
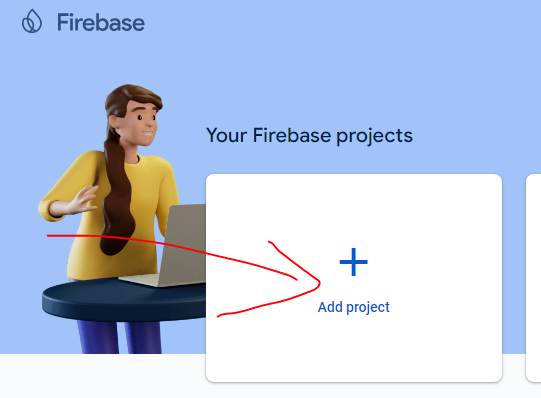
Step 4:- Click on the “Add Project” button to create a new project.
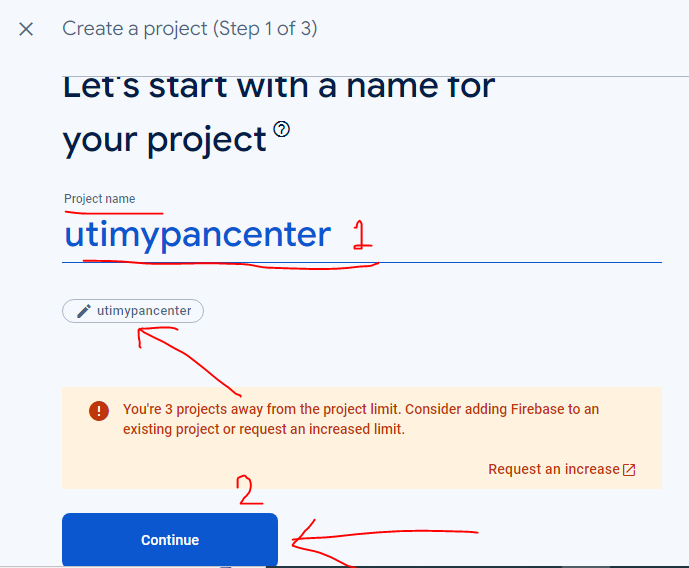
Step 5:- “Project Name” here you have to enter the name of your project, if you want to create a subdomain with the keyword “My Shop” then you will enter myshop without space, if there is any space available then it will not show any error, check the name in the pencil icon below, the name that will show will appear
Step 6:- The name displayed in the “pencil icon” will be your subdomain. You will get a subdomain like utimypancenter.web.app finally when you click on the Continue button.
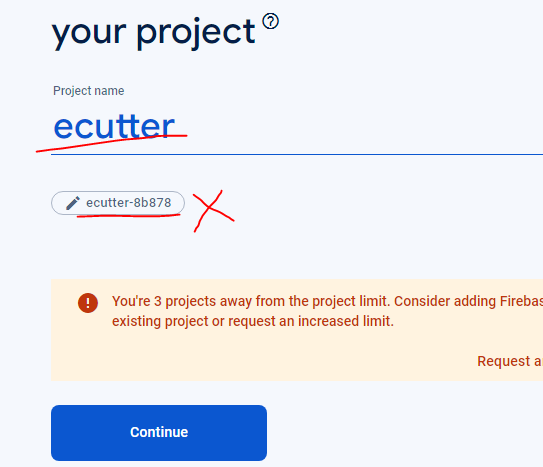
Step 7:- If some such name is shown in the pencil icon, for example, you entered your project name eCutter but eCutter-8b878 is shown in the pencil icon, then do not continue this project. If you continue then you will get a domain like ecutter-8b878.web.app.
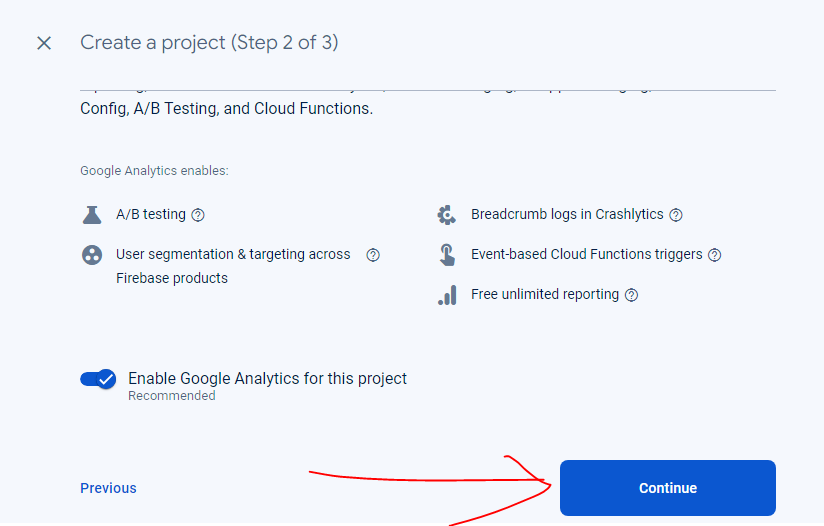
Step 8:- Click on “Continue” button to proceed.

Step 9:- Click on the “Create project” button and then select the default account as the base in the Choose and Create a Google Analytics account. If you do not get the option to select any other option then create your account on the Google Analytics website.
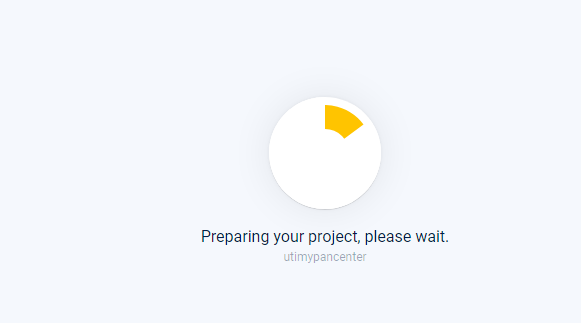
Step 10:- Preparing your project, please wait A message like this will be displayed while your project is being built.
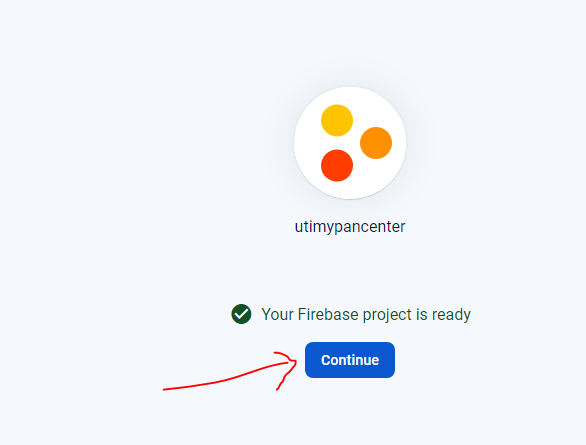
Step 11:- You will get a message “Your Firebase project is ready” which means your project has been created. Click on the continue button.
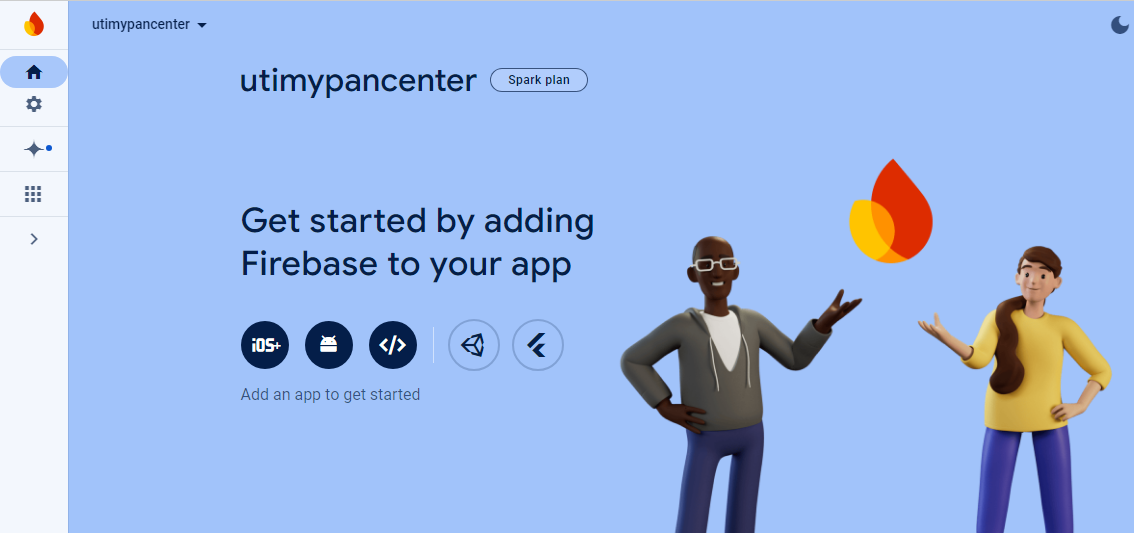
Step 12:- You get the dashboard of Google Firebase, its project has been created. Now to host your website, host the website file through “Command Prompt (cmd)”.
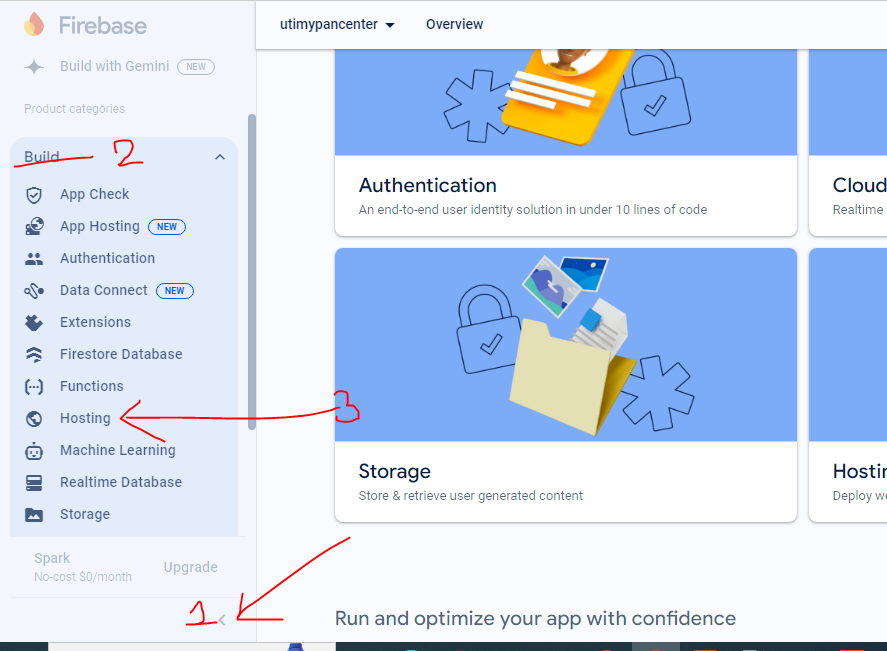
Step 13:-“Build > Hosting” You have to click on Build then you have to click on Hosting option.
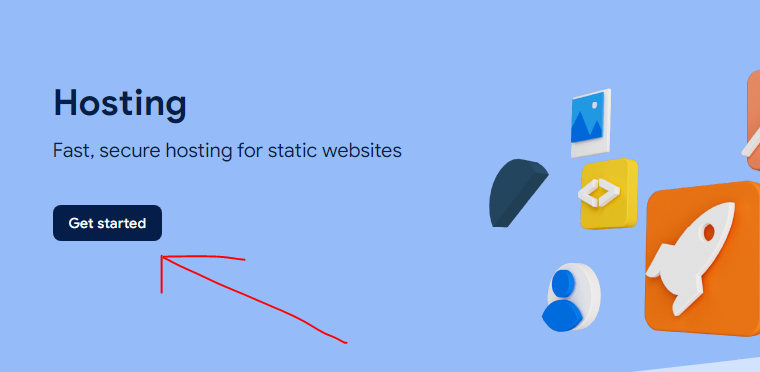
Step 14:- Click the “Get Started” button.
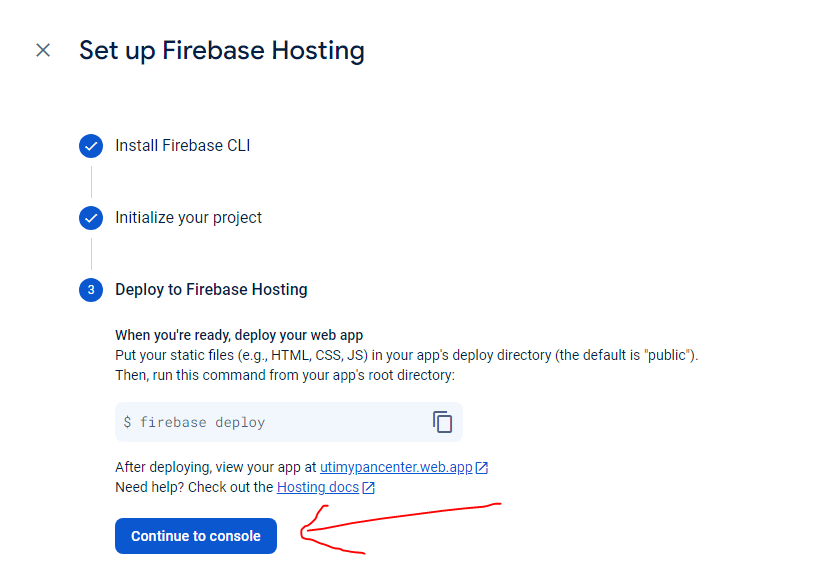
Step 15:- Proceed by clicking on Next button and then click on “Continue to Console” button.

Step 16:- “Domain” Here you get two default domains through Google Firebase through which you can access your website. It creates a subdomain using the project name you have given, so enter the project name without space.
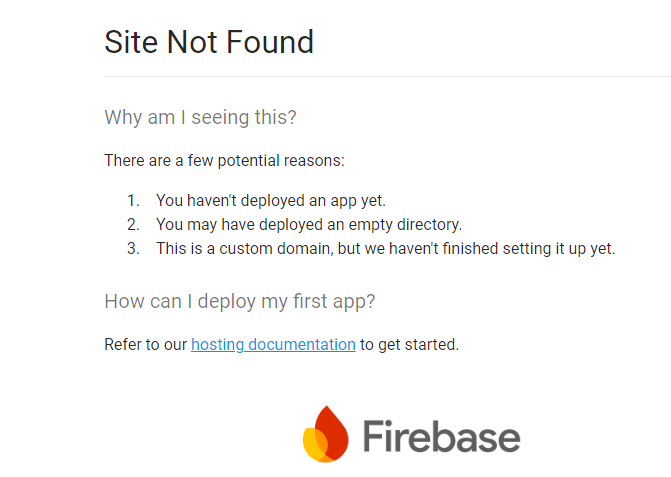
Site Not Found Firebase Hosting
Step 17:- Whenever you open the website, some such error is displayed to you. If you want to fix this problem then you will have to upload the source file of your website.
You cannot directly upload the source file of any website in Google Firebase hosting, for this you will have to upload the source file through Command (cmd). For this you will have to login to firebase on cmd, its complete process is below.
Required for firebase login command CLI ?
To use Firebase CLI, which includes commands like `firebase login`, you’ll need a system with Node.js installed. Node.js is a JavaScript runtime environment that allows you to run JavaScript on the server side. Firebase CLI is built on top of Node.js and is installed via npm (Node Package Manager), which comes with Node.js by default.
So, to use Firebase CLI and execute commands like `firebase login`, you need to have Node.js installed on your system. Once Node.js is installed, you can install Firebase CLI globally using npm with the command `npm install -g firebase-tools`.
After installing Firebase CLI, you can run `firebase login` from the command line to authenticate your Firebase account and gain access to Firebase services and resources. This allows you to deploy and manage your Firebase projects from the command line interface.
How to Download and Install nodejs on windows
Click on CLICK HERE button to download Online Node Js File, if you install our nodejs software in your computer/laptop, if you try to install it without nodejs, you will get an error display.
Error Name :
C:\Users\Admin\Downloads\ecardfolder\ecardcutter>node -v
‘node’ is not recognized as an internal or external command,
operable program or batch file.
C:\Users\Admin\Downloads\ecardfolder\ecardcutter>npm -v
‘npm’ is not recognized as an internal or external command,
operable program or batch file.
Welcome
Firebase Hosting Setup Complete
You’re seeing this because you’ve successfully setup Firebase Hosting. Now it’s time to go build something extraordinary!
Open Command Prompt: Open a new Command Prompt window.
Check Node.js and npm: Run the following commands to verify the installation:
node -v
npm -v
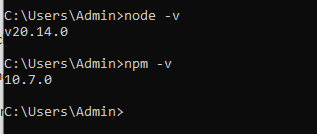
You should see the version numbers for Node.js and npm if they are installed correctly.
How to download Node js Software ?
Node js software download for https://softapk24.com/developer-tools/node-js-software-download/v20.14.0 visit this link.
You can easily download node js software from Soft APK 24 website, once you complete the node js software download, after using it you have to install the software in your system.
How to install Node JS Software in computer ?
If you want to install Node Jas software on your computer/laptop, then follow the steps given below –
Step 1:- Run Node Js Software : node-v20.14.0-x64
Step 2:- Then you have to complete the install process by clicking on the Next button.
Step 3:- When you move ahead, your Finish button will be found at the end.
In some ways you can install node js, and in some ways you can check the node js version which lets you know whether node js is installed in your system or not.
How to upload website on firebase ?
If you have created your project on Google Firebase and you want to upload the source file of your website in it so that the source file of your website can be displayed in the domain, then follow the steps given below –
Step 1:- Before uploading the website source file, node js should be installed in your computer, if it is not installed then you will get error after error, for this you should install node js by following the steps given above.
Step 2:- Go to “Start” and search for command and command.
Step 3:- After opening “Command Prompt (CMD)“, you have to run “node -v“, “npm -v” commands to check whether node js is installed or not. If it is installed, you will get to see the version of node js, if it is not installed then you will get an error.
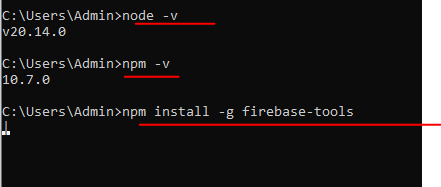
Step 4:- “Install Firebase CLI” Now that npm is installed, you can install the Firebase CLI: run this command “npm install -g firebase-tools” to install.
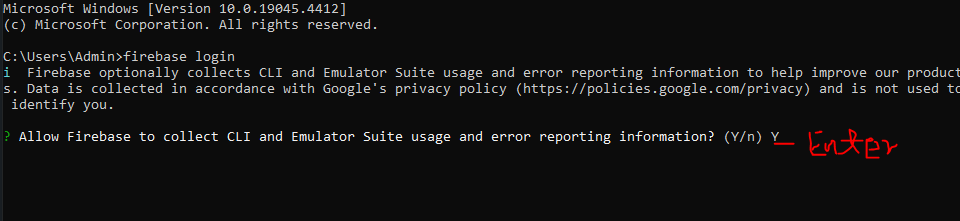
Step 5:- “Press Enter” If you want to “allow firebase to collect CLI and Emulator suite usage and error reporting information”, for this you enter “Y” and then press the ENTER button on the keyboard.
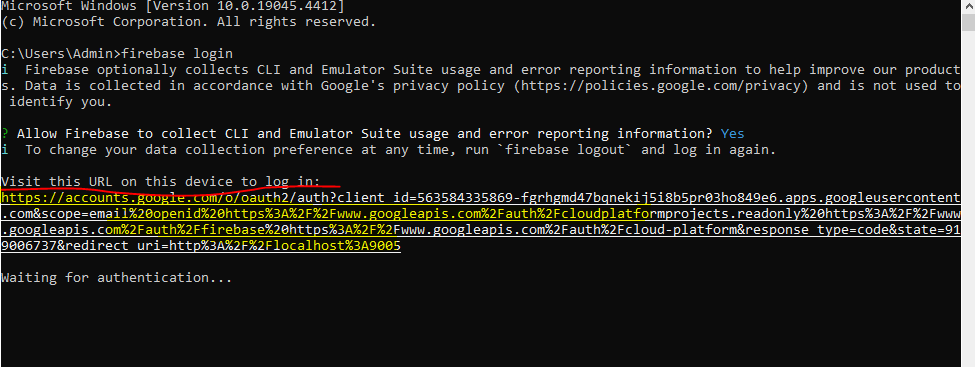
Step 6:- “Visit this URL on this device to log in” you should copy this link which is accounts.google.com/o/oauth2/auth?client_id=56350000….. open it in the browser in which your gmail is logged in, because this can automatically open any default browser in which your gmail is not logged in, so you should copy the display url properly and open it in which you had created your project.
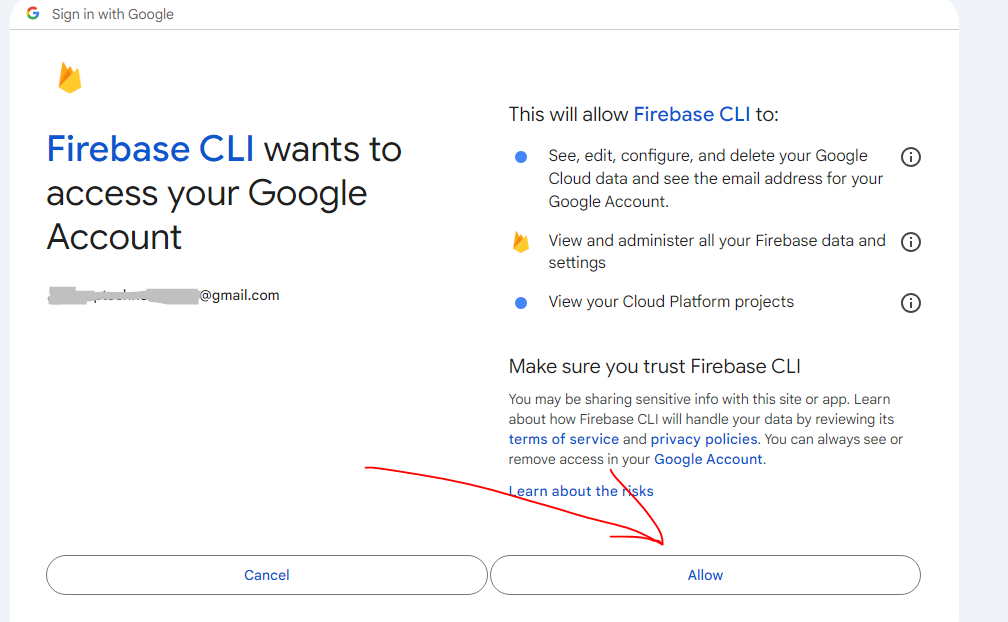
Step 7:- In “Firebase CLI wants to access your Google Account” click on the “Allow” button and proceed further.
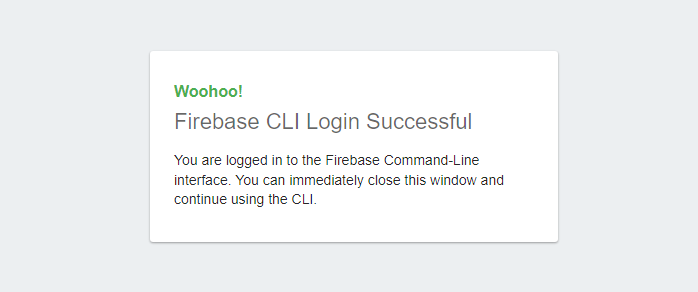
Woohoo!
Firebase CLI Login Successful
You are logged in to the Firebase Command-Line interface. You can immediately close this window and continue using the CLI.
Step 8:- “Firebase CLI Login Successfull” you will see a message like this which means you have been successfully logged in.
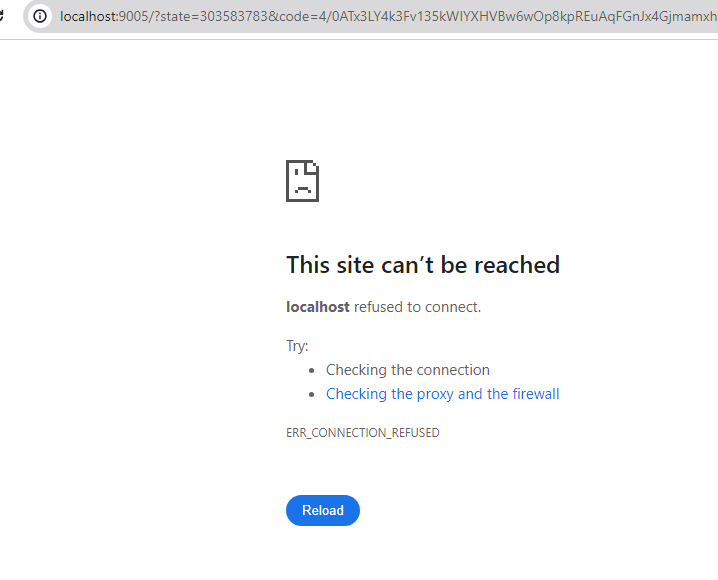
Step 9:- If you get an error like this site cannot be reached, then it may be that the URL you opened has been corrupted, in such a case you have to try logging into Firebase again. Whatever URL is displayed for login, copy it carefully and open it. This error will not occur.
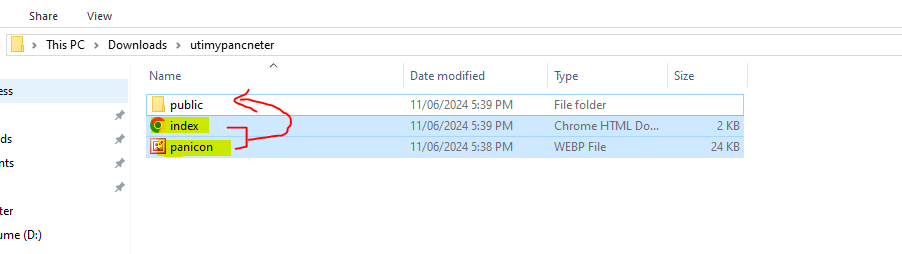
Step 10:- Create a folder in which create another folder with the same public name, then transfer the files in that public folder which you want to host on the website, that means move all the source files of the website to the folder with the public name, remember that the files of the website should be inside the public folder only.
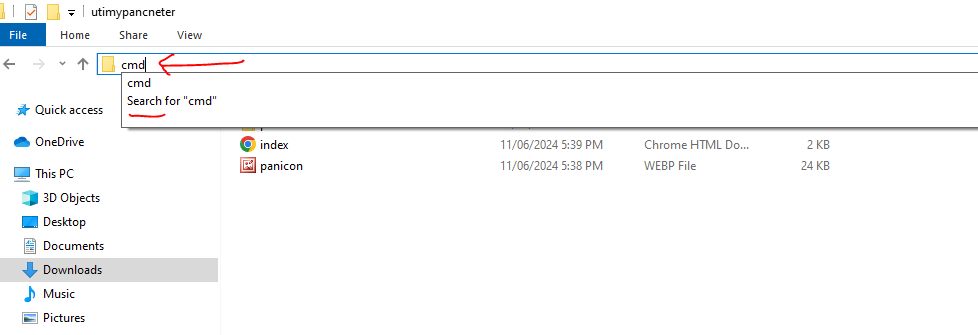
Step 11:- Come to just previous folder position of the public folder where your website file is kept and click on the folder path and type “CMD”.
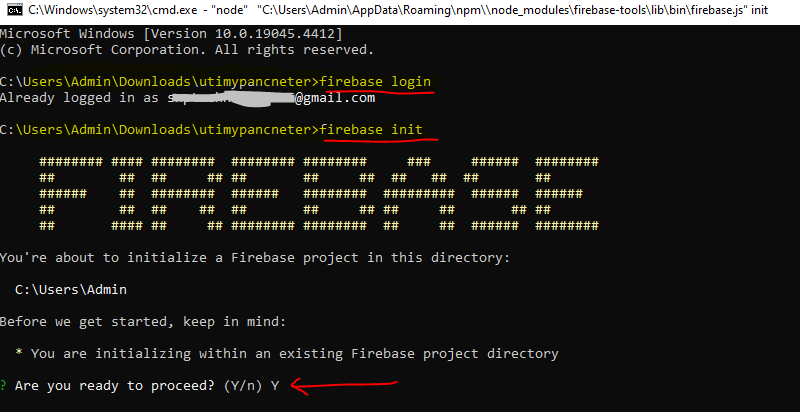
Step 12:- Enter “firebase login” to login to firebase. If you are already logged in then you will get a message “Already logged in to gmail.com”.
Step 13:- Enter “firebase init”, then enter “Y” keyword and press enter button on keyboard.
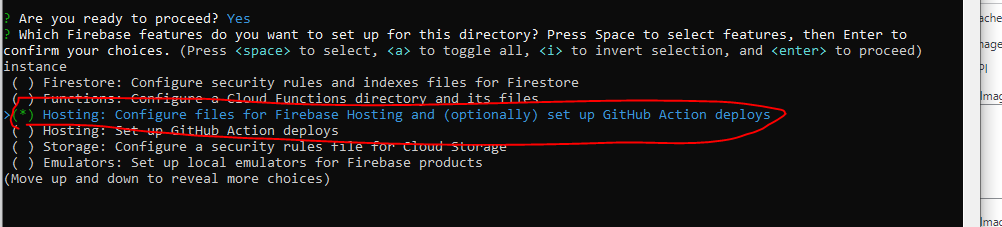
Step 14:- Here you will be shown many options out of which you only have to select the option “Hosting: Configure files for Firebase Hosting and (optionally) set up GitHub Action displays“. For this you have to visit the option using “UP Arrow” and “Down Arrow” from the keyboard and then press the “Space” button to confirm then click on Enter Button.

Step 15:- “Error: Must select at least one feature. Use SPACEBAR to select features, or specify a feature by running firebase init [feature_name]” if you get such an error then you are making a mistake, you are pressing Enter while selecting plans, you have to first click on the space button and then click on the enter button.
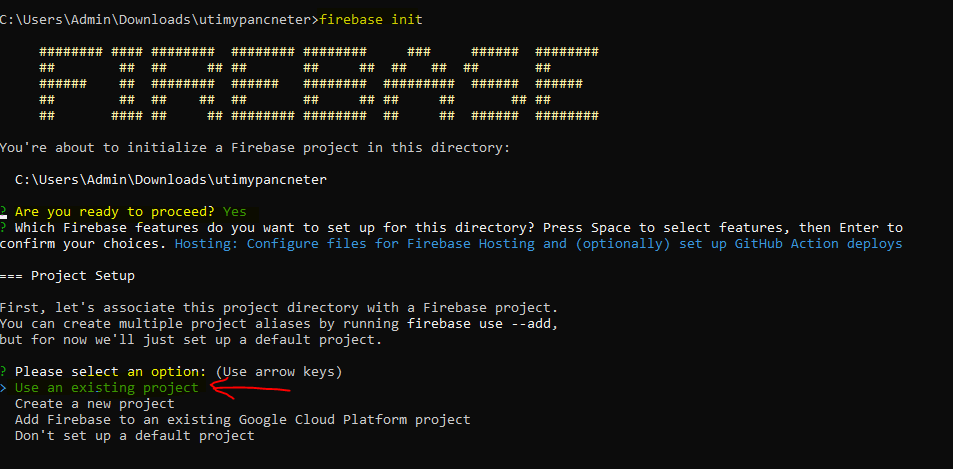
Step 16:- Proceed by entering “firebase init”, then enter “y” and press “Enter” button.
Step 17:- Select “Select an existing project” and press enter button.
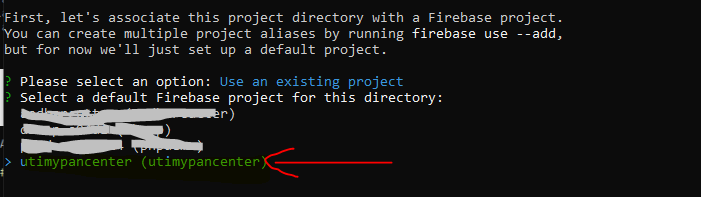
Step 18:- The name of the project name that you created will be displayed on your console firebase google website. You have to select that project name and press the Enter button.
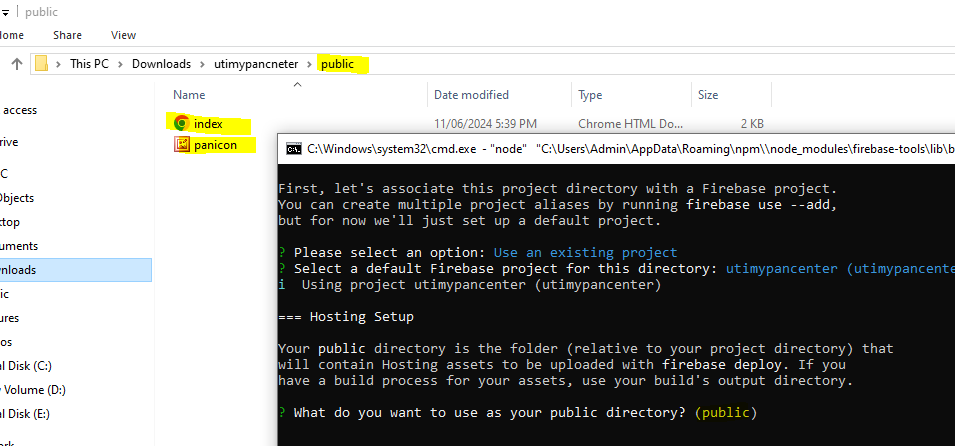
Step 19:- “What do you want to use as your public directory? (public)” If you get such a message then you have to do one thing, whatever website source files you are uploading, create a public folder and move it here You have to press “ENTER” button. And you have to run this cmd command at the position of the project folder, there should be a public folder inside it, this cmd command should not be run inside the public folder.
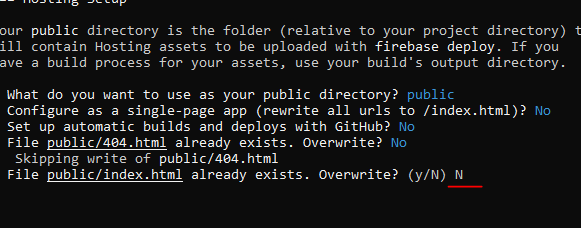
Step 20:- Here you will be asked some questions, you have to enter the answer of all as “N” and press “Enter” button.
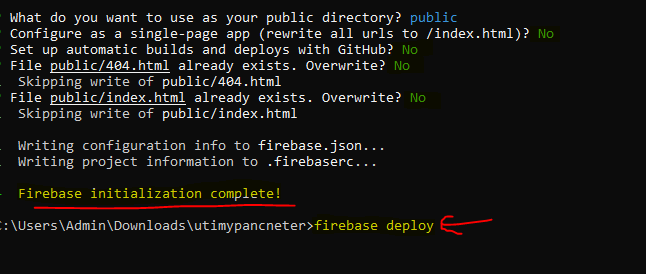
Step 21:- “Firebase initialization Complete!” message will appear. The firebase init command has been run successfully.
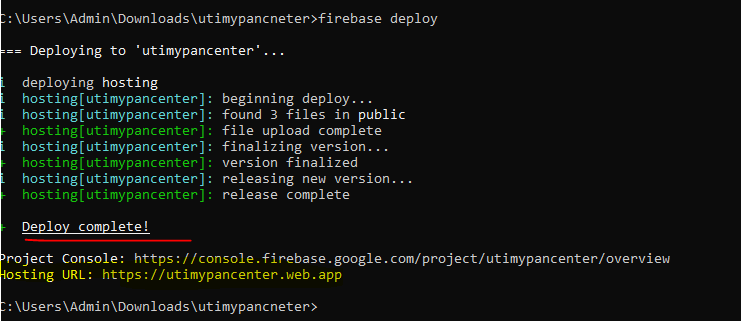
Step 22:- Enter the command “firebase deploy” and press the “Enter” button.
Step 23:- “Deploy Complete” message will be displayed, along with it you will also see the hosting URL, copy it and open it.
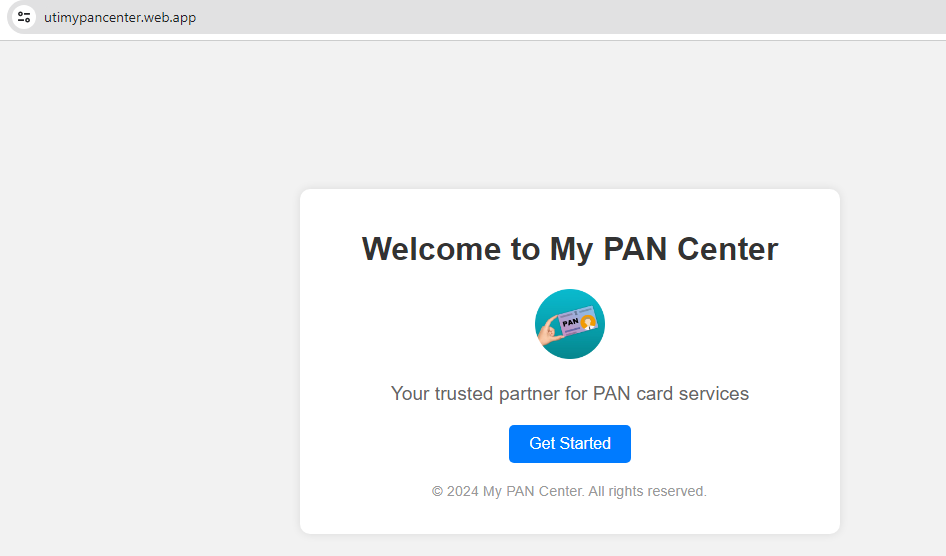
Step 24:- “Hosting URL” When you open it in the browser, you will see the source output of the website. Here the website has been successfully live.
How to fix Firebase Hosting Setup Complete Error ?
If you get such an error after deploying Firebase then how can you fix it. How can you display the source of your website? Because the actual data of your website is not showing, to solve this, follow the steps given below.
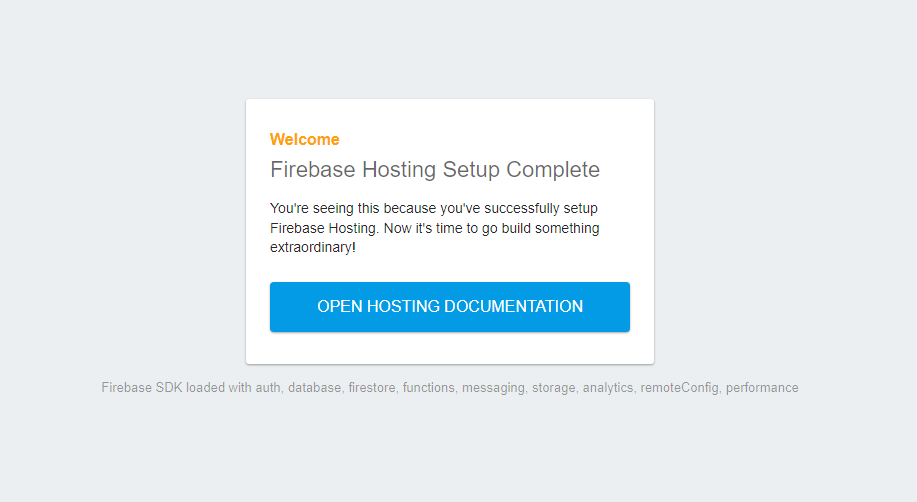
Welcome
Firebase Hosting Setup Complete
You’re seeing this because you’ve successfully setup Firebase Hosting. Now it’s time to go build something extraordinary!
OPEN HOSTING DOCUMENTATION
Firebase SDK loaded with auth, database, firestore, functions, messaging, storage, analytics, remoteConfig, performance
Step 1:- You face this error due to missing firebase.json file or wrong json setting, to solve this you will have to create a new firebase.json file.
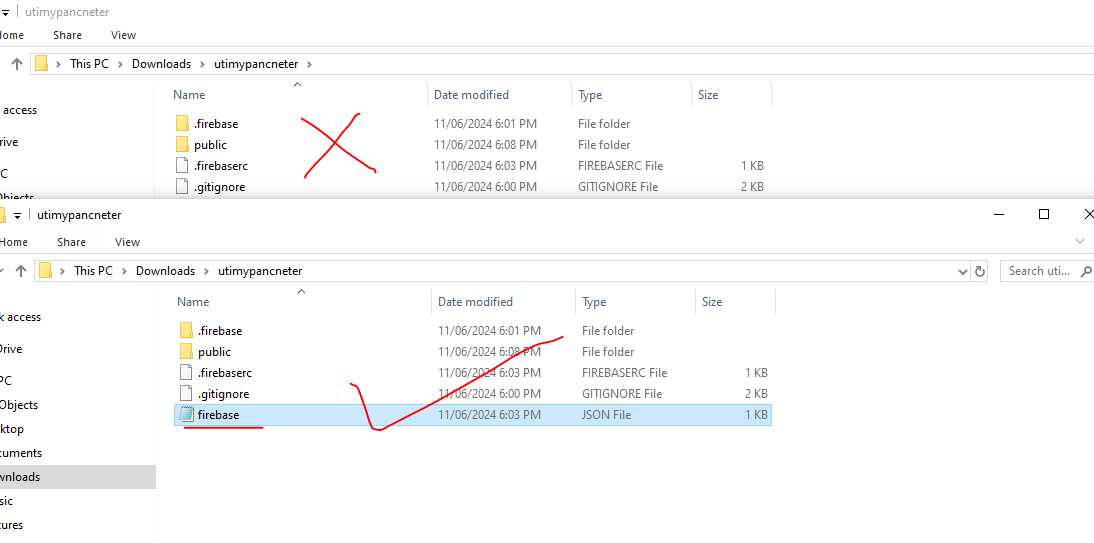
Step 2:- Create a firebase.json file.
Step 3:- firebase.json file in save this data.
{
"hosting": {
"public": "public",
"ignore": [
"firebase.json",
"**/.*",
"**/node_modules/**"
]
}
}
STEP 4:- When you create the file firebase.json and save it as this then your website will go live.
If you create a new file of firebase.json and save the code given here and run firebase init and firebase deploy commands then you will get to see the actual output of the website.
How to fix Error: Invalid project id:
When you are not able to delete any project of Firebase properly, due to some bug you get such an error. To solve this, follow the steps given below.
Step 1:- Open the command prompt.
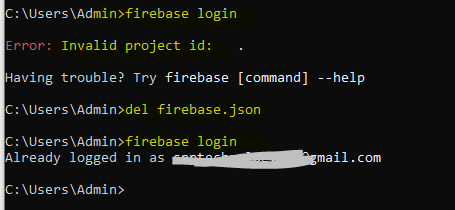
Step 2:- Run this command “del .firebaserc“. Delete the .firebaserc File: This file contains the current project configuration. Deleting it will reset the project association.
Step 3:- Run this command “del firebase.json“. Delete firebase.json (if necessary): If there’s an issue with firebase.json, you might want to delete it and recreate it during initialization.
Step 4:- Run this command “firebase login” and you will not get any error.
There are some ways you can fix this error.