Storing files on Google Cloud Storage (GCS) using PHP is a straightforward process, thanks to the Google Cloud PHP Client Library. This guide will walk you through the steps to upload files to GCS and generate a signed URL for accessing the files.
Google Cloud Storage provides a flexible object storage that can be accessed from PHP in different ways. Each of these implementations has its benefits and downsides.
Google Cloud Storage (GCS) is a service that provides cheap and massive object storage, where objects are simply chunks of data such as file contents. This makes GCS suitable for applications like backups, web hosting, media file storage, content delivery networks, data lakes, etc. Being able to access GCS from PHP applications and scripts creates a lot of possibilities for companies and organisations that rely on a PHP code base and knowledge.
Streams have been part of PHP for a long time now. They are a generalization of file, network and other data stream operations, and they use so-called wrappers to implement specific protocols and encodings. If you ever wondered why you could do a file_get_contents on a URL, wonder no more. HTTP is just another protocol implemented in a stream wrapper. The PHP package that Google provides for GCS access includes a stream wrapper that can be registered, allowing GCS access through regular PHP stream functions like fopen or file_get_contents.

How to Store Files on Google Cloud Storage Using PHP
Creating a Firebase project involves several steps, including setting up your Firebase project in the Firebase console, configuring your app, and integrating Firebase services. Here’s a detailed guide on how to do it:
Step 1: Create a Firebase Project
- Go to Firebase Console:
- Navigate to the Firebase Console.
- Add a Project:
- Click on the “Add project” button.
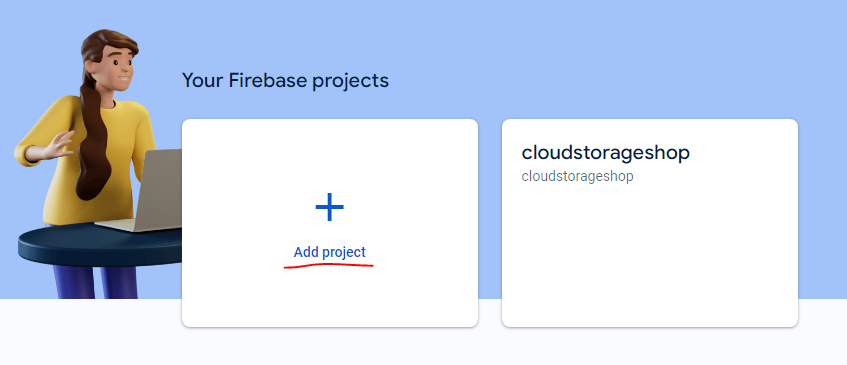
- Click on the “Add project” button.
- Project Name:
- Enter a project name. This will be the identifier for your project across Firebase and Google Cloud.
- Click “Continue”.
- Google Analytics:
- You can enable Google Analytics for your project. This step is optional but recommended for tracking user engagement.
- If you enable it, you will need to configure your Analytics settings.
- Configure Project Settings:
- Select your Analytics location and agree to the Firebase terms.
- Click “Create project”.
- Project Creation:
- Firebase will set up your project. This may take a few moments.
- Once completed, click “Continue” to be redirected to your new Firebase project dashboard.
How to Download Firebase credentials JSON
To generate the firebase_credentials.json file, which contains the service account credentials for Firebase, follow these steps:
Step 1: Navigate to Firebase Project Settings
- Go to Firebase Console:
- Navigate to the Firebase Console.
- Select Your Project:
- Click on the project for which you want to generate the credentials.
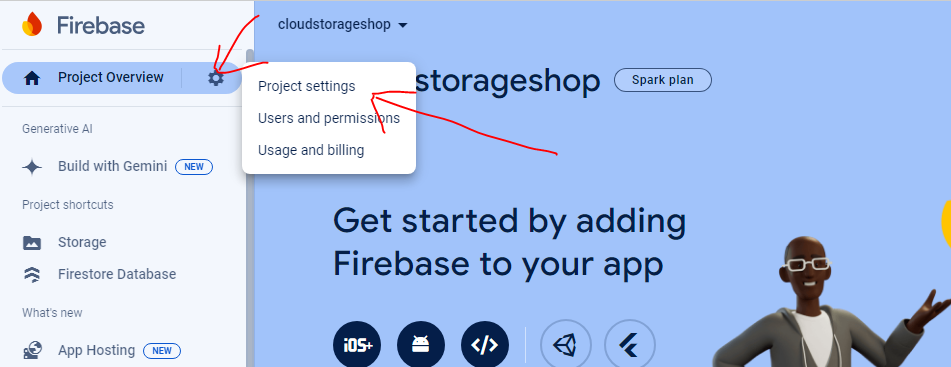
- Open Project Settings:
- Click on the gear icon next to “Project Overview” in the sidebar.
- Select “Project settings” from the dropdown menu.
Step 2: Create a Service Account
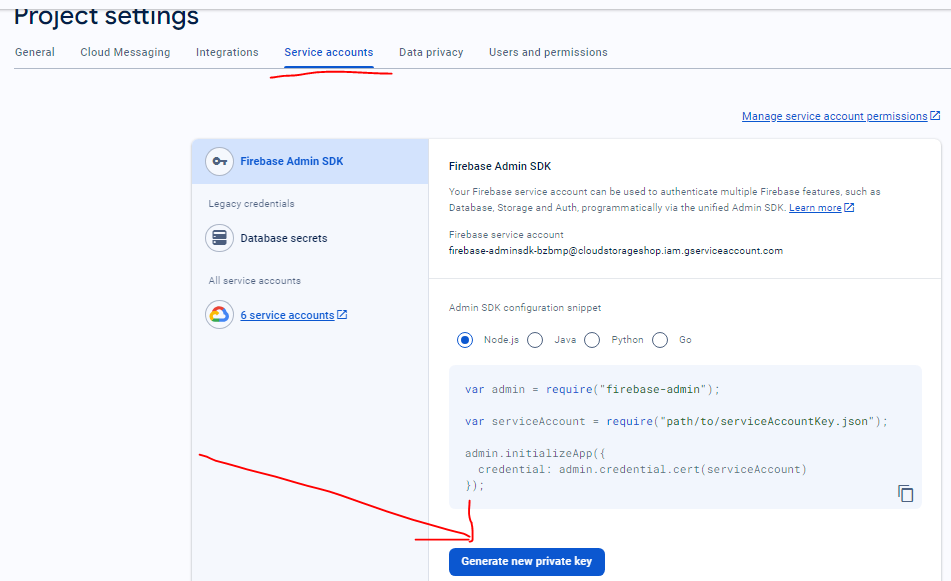
- Go to Service Accounts:
- In the Project settings page, click on the “Service accounts” tab.
- Generate a New Private Key:
- Click on the “Generate new private key” button.
- A prompt will appear, asking for confirmation to generate a new private key.
- Download the JSON File:
- Confirm the action, and a JSON file containing your service account credentials will be downloaded to your computer. This file is typically named
project-id-firebase-adminsdk-xxxxx-xxxxxxxxxx.json.
- Confirm the action, and a JSON file containing your service account credentials will be downloaded to your computer. This file is typically named
Step 3: Rename and Secure the File
- Rename the File:
- Rename the downloaded JSON file to
firebase_credentials.json(or any other preferred name).
- Rename the downloaded JSON file to
- Secure the File:
- Store this file securely, as it contains sensitive information that grants access to your Firebase project. Ensure it’s not exposed in your source code repository by adding it to
.gitignoreor similar ignore files.
- Store this file securely, as it contains sensitive information that grants access to your Firebase project. Ensure it’s not exposed in your source code repository by adding it to
kreait/firebase-php library download
To store a PDF file in Firebase Storage using PHP, you’ll need to follow these steps:
Prerequisites
- Firebase Project: Ensure you have created a Firebase project and set up Firebase Storage.
- Firebase SDK: Include Firebase SDK for PHP in your project. You can install it via Composer:
composer require kreait/firebase-php
If you haven’t used Composer before, you’ll need to set up
composer.jsonand runcomposer installto install dependencies. - Service Account: Download the service account JSON file from Firebase Console (
Settings > Service Accounts). This JSON file contains credentials that allow your PHP script to authenticate with Firebase.
How to Upload Files to Firebase Storage Using PHP
In this article, we’ll go through the process of uploading files to Firebase Storage using PHP. We’ll use the Firebase Admin SDK for PHP, specifically the Kreait Firebase PHP SDK, to handle the upload and generate a signed URL for downloading the file.
Prerequisites
Before you start, ensure you have the following:
- Firebase Project: Set up a Firebase project in the Firebase Console.
- Service Account Key: Download the JSON file for your service account from the Firebase Console.
- Composer: PHP dependency manager installed on your system.
Step 1: Install the Firebase PHP SDK
First, you need to install the Firebase PHP SDK via Composer. If you don’t have Composer installed, you can download it from getcomposer.org.
composer require kreait/firebase-php
Step 2: Prepare Your PHP Script
Create a PHP script to handle the file upload. In this example, we’ll name it upload.php.
error_reporting(E_ALL);
ini_set('display_errors', 1);
require 'vendor/autoload.php'; // Path to Composer autoload
use Kreait\Firebase\Factory;
// Path to your JSON key file
$serviceAccountPath = __DIR__ . '/serviceAccountKey.json'; // Update with the correct path
// Initialize Firebase using the Factory class with the JSON key file
$factory = (new Factory)->withServiceAccount($serviceAccountPath);
$storage = $factory->createStorage();
// File to upload
$file = '230595060707_Cert.pdf'; // Replace with the path to your file
// Ensure the file exists
if (!file_exists($file)) {
die("File not found: $file");
}
// Storage bucket and destination in Firebase Storage
$bucket = $storage->getBucket();
$object = $bucket->upload(file_get_contents($file), [
'name' => 'cloudstore/' . basename($file)
]);
// Set the expiration date and time for the signed URL
$expirationDateTime = new \DateTime();
$expirationDateTime->modify('+1 minutes'); // Set the URL to expire in 1 minute
// Get the download URL of the uploaded file with the expiration date
$downloadUrl = $object->signedUrl($expirationDateTime);
echo "File uploaded successfully. Download URL: $downloadUrl";
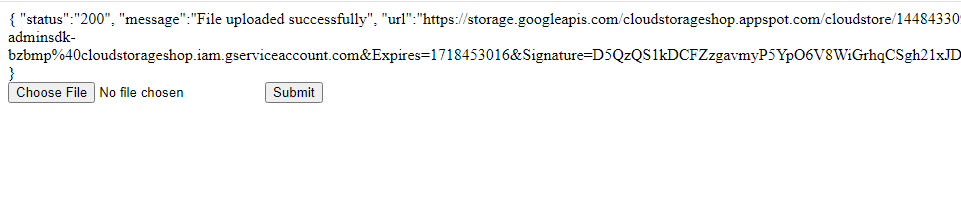
https://storage.googleapis.com/cloudstorageshop.appspot.com/cloudstore/1448433098ezgif-7-edd9bccb95.gif?GoogleAccessId=firebase-adminsdk-bzbmp%40cloudstorageshop.iam.gserviceaccount.com&Expires=1718453016&Signature=D5QzQS1kDCFZzgavmyP5YpO6V8WiGrhqCSgh21xJDb5YrYtCqTnUNMvcPK
Step 3: Configure Firebase
To use the Firebase Admin SDK, you need to create a service account in your Firebase project and download the service account key JSON file.
- Go to the Firebase Console.
- Select your project.
- Click the gear icon next to “Project Overview” and select “Project settings”.
- Go to the “Service accounts” tab.
- Click “Generate new private key” and download the JSON file.
- Save the JSON file in your project directory and update the
$serviceAccountPathin your script with the correct path.
Step 4: Upload the File
Ensure the file you want to upload exists in your project directory or specify the correct path to the file in the $file variable. In this example, we’re using a file named 230595060707_Cert.pdf.
Explanation
- Error Reporting: Enables error reporting for debugging purposes.
- Autoload: Requires the Composer autoload file to load dependencies.
- Firebase Initialization: Uses the
Factoryclass to initialize Firebase with the service account credentials. - File Upload: Reads the file and uploads it to Firebase Storage under the
cloudstore/directory. - Signed URL: Generates a signed URL that allows users to download the file within a specified time frame (1 minute in this case).
This script demonstrates a basic file upload to Firebase Storage using PHP. You can modify it to suit your specific needs, such as handling different file types, adjusting the expiration time, or adding error handling and logging.
File Upload and Delete in google firebase storage full source code download
All Complete Source Code Link : googlestoragesource
File Upload and Delete in google firebase storage full source code download below :