Error executing “PutObject” on “https://my-shop1.s3.ap-south-1.amazonaws.com/products/b63c7e59ff9c6040161f80e436eaabab.jpg“; AWS HTTP error: Client error: `PUT ▶

\n

AccessDeniedAccess DeniedE5EA21 (truncated…)\n
AccessDenied (client): Access Denied – \n
AccessDeniedAccess DeniedE5EA2109F158B3BEku8TuqbKq7fvjw5QenbrNDJx+beRZcqlEtLZICkHQEwgCJAqZ/l/qG6QV4RP+MODCFd80da0v9g=

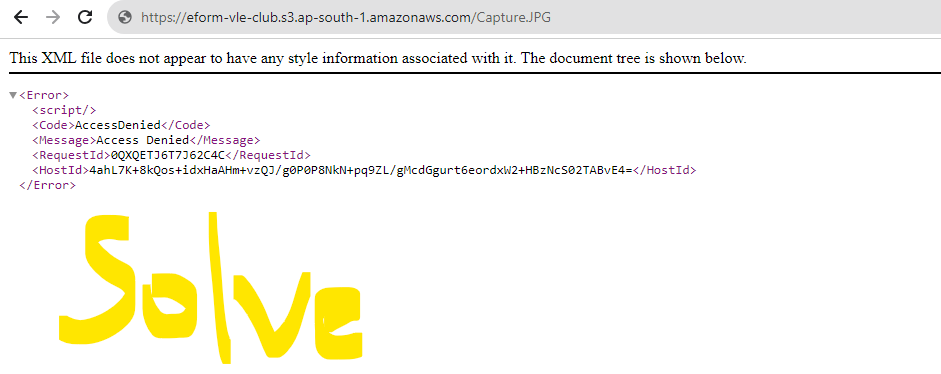
unable to upload files to aws s3 bucket shows ” A PHP Error was encountered Severity: User Warning

Message: S3::putObject(): [AccessDenied] Access Denied

Filename: libraries/S3.php”

AmazonS3FullAccess on bucket policies/accesing by specifying the access_key,secret_key,bucket_name,s3_url,foldername etc /root user having all permissions
  • Step 1: Set Up Your AWS Credentials. To connect to S3, you’ll need to provide your AWS credentials. You can do this by setting environment variables or by using the AWS SDK for PHP to set the credentials programmatically.
  • Step 2: Connect to S3. Once you’ve set up your credentials, you’re ready to connect to S3.

How to fix AWS S3 file upload access denied in php

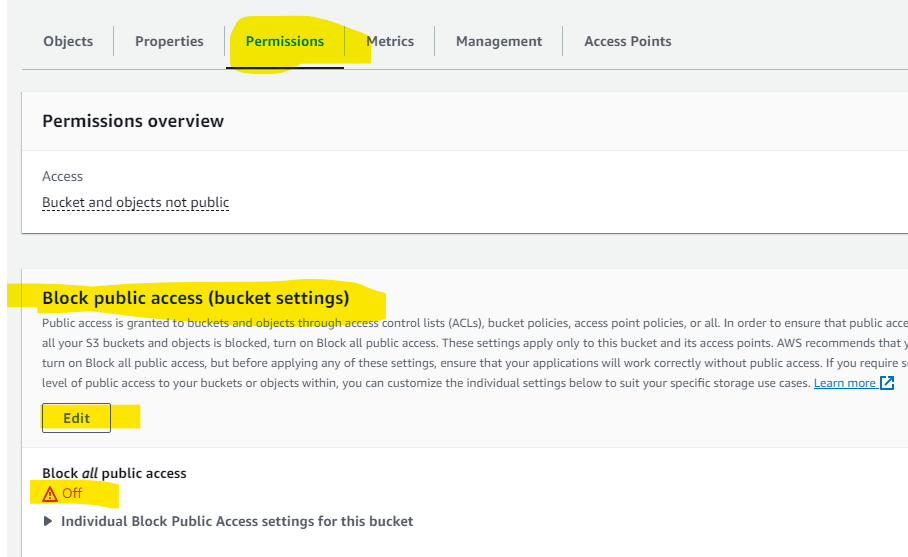
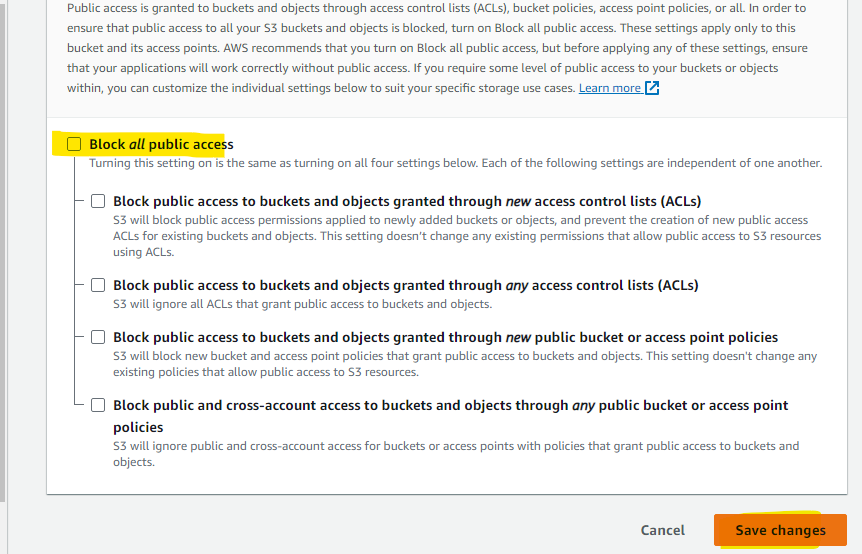
This error comes due to a mistake, it comes if you do not add aws s3 bucket policy when you create buckets.
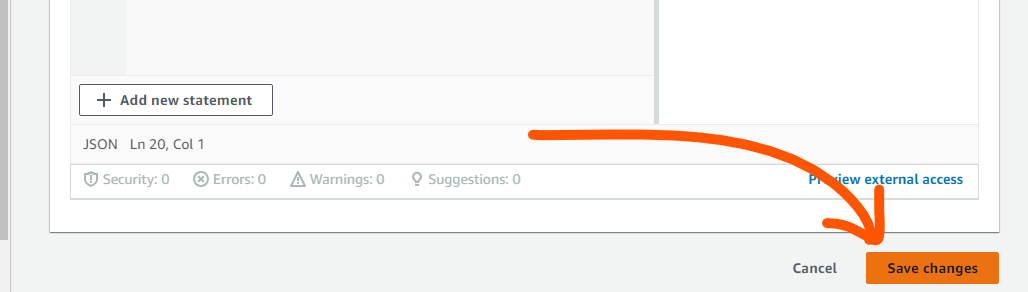
  • Step 1:- Login to Amazon AWS S3
  • Step 2:- Open Amazon S3>Buckets
  • Step 3:- The buckets you have created will be displayed in the buckets list. Please click on it.
  • Step 4:- After opening the bucket you created, click on Permissions. Bucket-Name > Permissions.
  • Step 5:- Go to Bucket policy and click on edit button.
  • Step 6:- Then the Edit bucket policy section will open in front of you, at the bottom there will be an option to save JSON, in which you have to enter a code and save it.

Policy Code

{
	"Version": "2012-10-17",
	"Statement": [
		{
			"Effect": "Allow",
			"Principal": "*",
			"Action": [
				"s3:PutObject",
				"s3:PutObjectAcl",
				"s3:GetObject",
				"s3:GetObjectAcl",
				"s3:DeleteObject"
			],
			"Resource": [
				"arn:aws:s3:::Bucket-Name",
				"arn:aws:s3:::Bucket-Name/*"
			]
		}
	]
}

  •   Step 7:- You should copy the Bucket ARN code and go to bucket policy code and change Resource > ARN.

  • Step 8:- After changing the ARN, click on Save changes button.
  • Step 9:- If it is not saved then you will have to go to Permissions and turn off the Block public access (bucket settings) option.

  • Step 10: Click on Permissions, then go to Block public access (bucket settings) section, check Block all public access On or Off, then click on Edit Button.

  • Step 11:- Untick Block all public access then click on Save button below.
  • Step 12:-  After turning off Block all public access, enter the code in Bucket policy and save it.


Leave a Reply

Your email address will not be published. Required fields are marked *